Morris chairs…

In the fall of 2014 I told my wife I’d build her a rocking chair of her choice for us to rock our soon to be born baby in (this was our first child and he was born in April 2015). After looking at a few styles she chose a morris chair. What follows is a few blog posts I wrote at the time...

I’ve only helped to build a couple of chairs and none were rockers, so I did a decent amount of research before coming up with a design. The one I settled on is pretty close to an old Stickley design, with a few proportional changes. I decided to build two chairs, one a rocker and one not. Given the time involved in set-up and the jigs to be made, I guessed it would only add another 1/3 of the time to build a second chair. The second chair will be for sale when they’re done.

I purchased the quarter-sawn white oak lumber from Sears Trostel in Fort Collins- they had a great selection and I picked through it to get the best boards I could find. For fabric we chose an authentic William Morris design printed in England by Laura’s Beau. For a William Morris fabric the price was fantastic and they somehow had it affordably shipped here in 3 business days. How is that possible?

Through a number of posts I’ll show some of the progress of the chairs…

Morris chairs part 2, arm mortises…

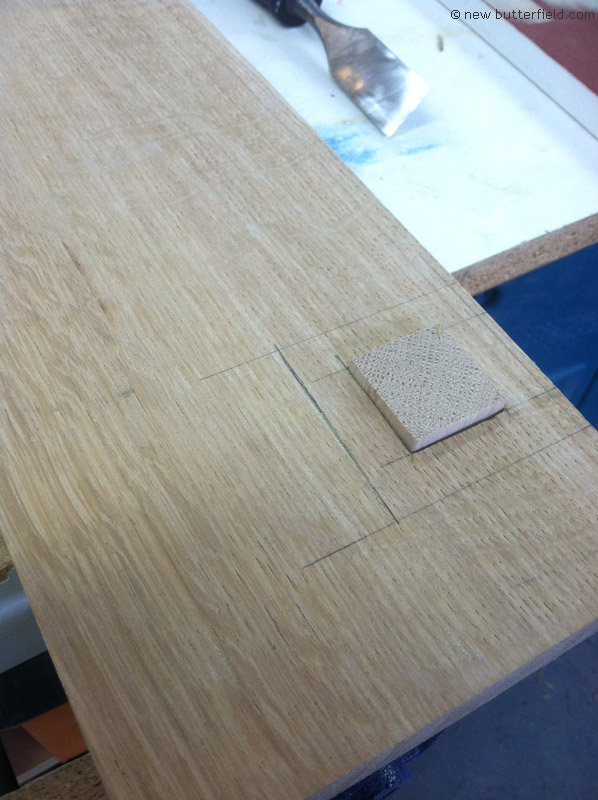
In my design the legs are attached to the arms with wedged through-tenons which will be trimmed flush with the arm’s surface. First I cut the tenons on the top of the legs and then proceded to cut the mortises in the arms. The pic below is of the first mortise, started with a forstner bit and trimmed square with a sharp chisel. The beer is for safety.

IMG_0588_opti.jpg

This pic is of the through tenon (before being drilled and slotted for wedges) through the squared mortise. At this point the mortise is just a square hole, cut 90° to the to the top of the arm.

IMG_0589_opti.jpg

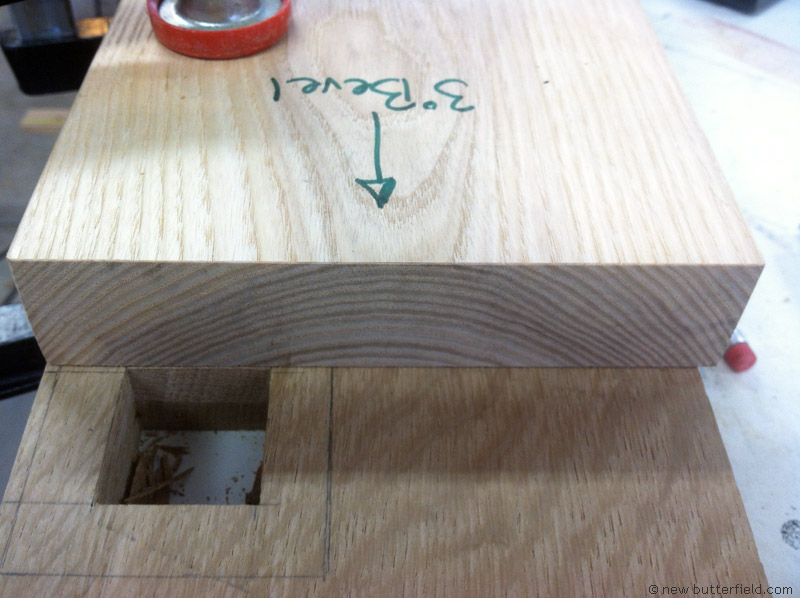
To allow a wedged tenon to spread open (and give the joint it’s strength) the mortise now needs to be bevelled. I used a block of hickory cut at 3° as a guide and pared away the top of the mortise on the two sides I will be spreading the tenon towards.

IMG_0592_opti.jpg

Now to finish the tenons…

Morris chairs part 3, wedged tenons…

For the tenons to be wedged they need to have slots for the wedges to slide into, so I cut those with a narrow hand saw blade. The holes below the slots are to allow the tenon to spread wide easily. In this case the finished tenons will spread about 1/4″ total.

IMG_0598_opti.jpg

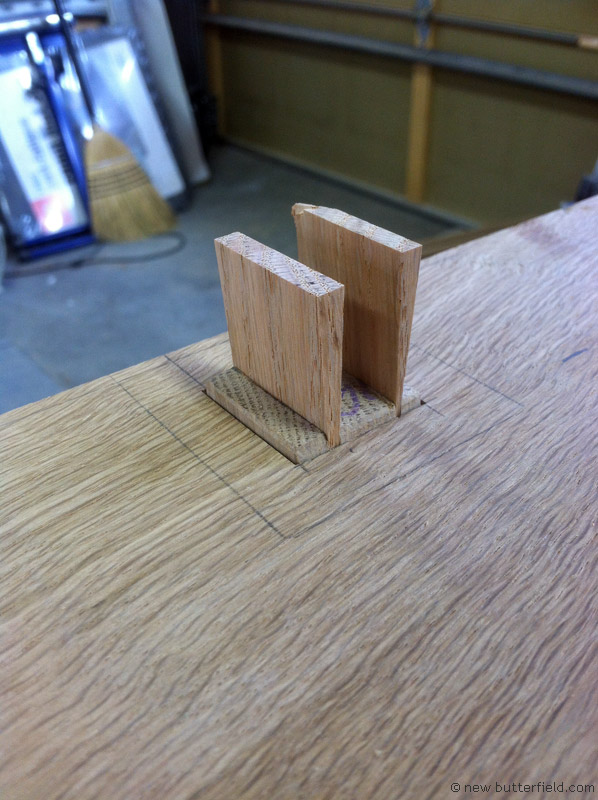
Here is the tenon through the mortise with the wedges set loosely in place.

IMG_0593_opti.jpg

Morris chairs part 5, the rockers…

For the rockers I decided to use bent laminations. First I built a form out of scraps at a 42″ radius, then I machined strips of flat-sawn white oak to make up the rockers. Each rocker consists of six 1/8″ thick layers glued together with urea formaldehyde glue. I probably over-did the clamps but having never used this type of glue before I played it safe.

IMG_0610_opti.jpg
IMG_0611_opti.jpg

For this pic I wiped the sanded rocker with water to highlight the different layers. Once finished the layers will be indistinguishable from one another.

IMG_0619_opti.jpg

Next I scribed the legs to the curve of the rocker, attached them and prepped for finishing.

IMG_0624_opti.jpg

Morris chairs part 6, finish…

For the stain I did a few samples and we settled on a 2 to 1 ratio of TransFast mission brown and light oak dyes. Most of this finish schedule is one I learned from Carter Rich, the guy who I apprenticed for and taught me 90% of what I know about woodworking (I’ve been doing this for 10 or 12 years and he’s got about 30 years of experience on me, I bet he’s forgotten more than I’ve learned at this point). It’s similar to Jeff Jewett’s but I personally think it’s a little better. I’ve changed Carter’s process slightly to lighten the flake a bit more and to accommodate the sprayer and water based top coats I now use.

One chair stained, one to go...

IMG_0646_opti.jpg

The rocker bottom after application of stain and linseed oil but before the top-coats…

IMG_0651_opti.jpg

Rocker bottom after shellac sealers and final coat of Target Coatings EM6000 lacquer...

IMG_0666_opti.jpg

All that’s left are the cushions and upholstery.